
Vectrex Studio builds for four kinds of hardware: the original Vectrex with its 6809, the PiTrex, the RP2350 debug cartridge, and the Ultimate Vectrex Multicart 2. You pick one as the Build Target in Settings (or target in the project file), and every build after that is for it.
Comparison
| Original Vectrex | PiTrex | RP2350 debug cartridge | UVMC2 | |
|---|---|---|---|---|
| Target name | m6809 | pitrex | rp2350 | uvm2 |
| CPU running the game | The console's MC6809 | Raspberry Pi (ARM32) | RP2350 (ARM Thumb-2) | RP2350, both cores |
| Output | .bin ROM | .img image | RAM image .bin (or flash) | .um2 image |
| How it reaches the console | EPROM, or the IDE emulator | The PiTrex board | SD card through the cartridge's menu, flash, or SWD | SD card through the multicart's menu, or USB upload |
| VPy | Yes | Yes | Yes | Yes |
| C | No | Yes | Yes | Yes |
| 3D builtins | No (compile error) | No | When built through C | Yes |
| Debugger | Emulator | None | Emulator and SWD | Emulator and USB |
The 6809 target needs nothing beyond the IDE. The three ARM targets build against the SDK pinned by your project; see Projects, SDK & Toolchains.
Original Vectrex (MC6809)
The classic target. The compiler produces a .bin cartridge ROM, single-bank or multibank, that runs on the console's own 6809 and in the IDE's cycle-accurate emulator. No SDK is involved.
To play it on a real console, write it to an EPROM from the IDE: see EPROM Programmer.
PiTrex
An ARM32 target for the PiTrex board, a Raspberry Pi that drives the Vectrex directly. The build produces a .img image and needs arm-none-eabi and the PiTrex SDK (PITREX_SDK). VPy projects can link the SDK's libvpy C runtime optionally, and C projects can target PiTrex too.
There is no debugger on PiTrex. Develop in the emulator and test on the board.
PiTrex in v0.4: PiTrex ran in v0.3 on the old SDK. It has not been tried on hardware with the new one yet, so how it behaves there is still an open question; a later release will settle it.
RP2350 Debug Cartridge
Our own RP2350-based development cartridge. A firmware BIOS on the cartridge halts the 6809, drives the console's bus, shows a menu of the games on its SD card, and gives games the drawing, sound and input services through system calls.
The target's options in Settings choose how the game gets there:
- SD card, RAM-linked: the build writes a RAM image (
build/<name>_sd.bin) that the cartridge's menu loads and launches. An SD card folder can be set so the build copies it there for you. - Flash, through XIP, optionally written on every Build & Run.
- SWD, with a debug probe: Debug on Cartridge writes the game straight into the cartridge's PSRAM and launches it from the menu (see Debugging).
UVMC2 — Ultimate Vectrex Multicart 2
The UVMC2 is an RP2350-based multicart, and the most capable target Vectrex Studio has. Its firmware shows a menu and loads a .um2 file from the SD card into the RP2350's RAM; from then on the game owns the machine. VPy games target it with target = "uvm2", and C projects with the SDK's uvm2.mk recipe.
The multicart offers no BIOS and no API, so the SDK brings its own runtime:
| Feature | What it means for your game |
|---|---|
| Halt mode | The game halts the console's 6809 and drives the Vectrex's VIA chip itself, in lock-step with the console's 1.5 MHz bus clock. |
| Dual core + PIO + DMA | One core runs the game while the other draws. Each frame's drawing commands go out as a single DMA transfer through the RP2350's PIO. This is required for every UVM2 build. |
| Refresh rate | Per game: 50 Hz, 60 Hz, or as fast as the frame allows. |
| PSRAM | Games can be linked in the 8 MB PSRAM, for games far larger than the SRAM. |
| SD files | Games read their own data from the card, including arcade romsets, and can write files too. |
| Audio jack | A 16-bit audio output, with sample streaming, next to the console's own PSG. |
| Rotation | 90° display rotation for games designed for a vertical screen. |
| Calibration | A calibration wizard tunes the beam to your console once, for every game. |
Calibration
Every Vectrex is slightly different, so the beam constants belong to the console, not to the game. Hold buttons 2 and 3 while launching any SDK game and the calibration screen (the wheel) opens first. The console's calibration is kept in UVM2.CFG on the card, and each game's own settings in a separate file, so calibrating your console never touches a game's settings. Games can also open it themselves with CALIBRATE().
The fields, the figures and how to judge them: Calibrating a Console.
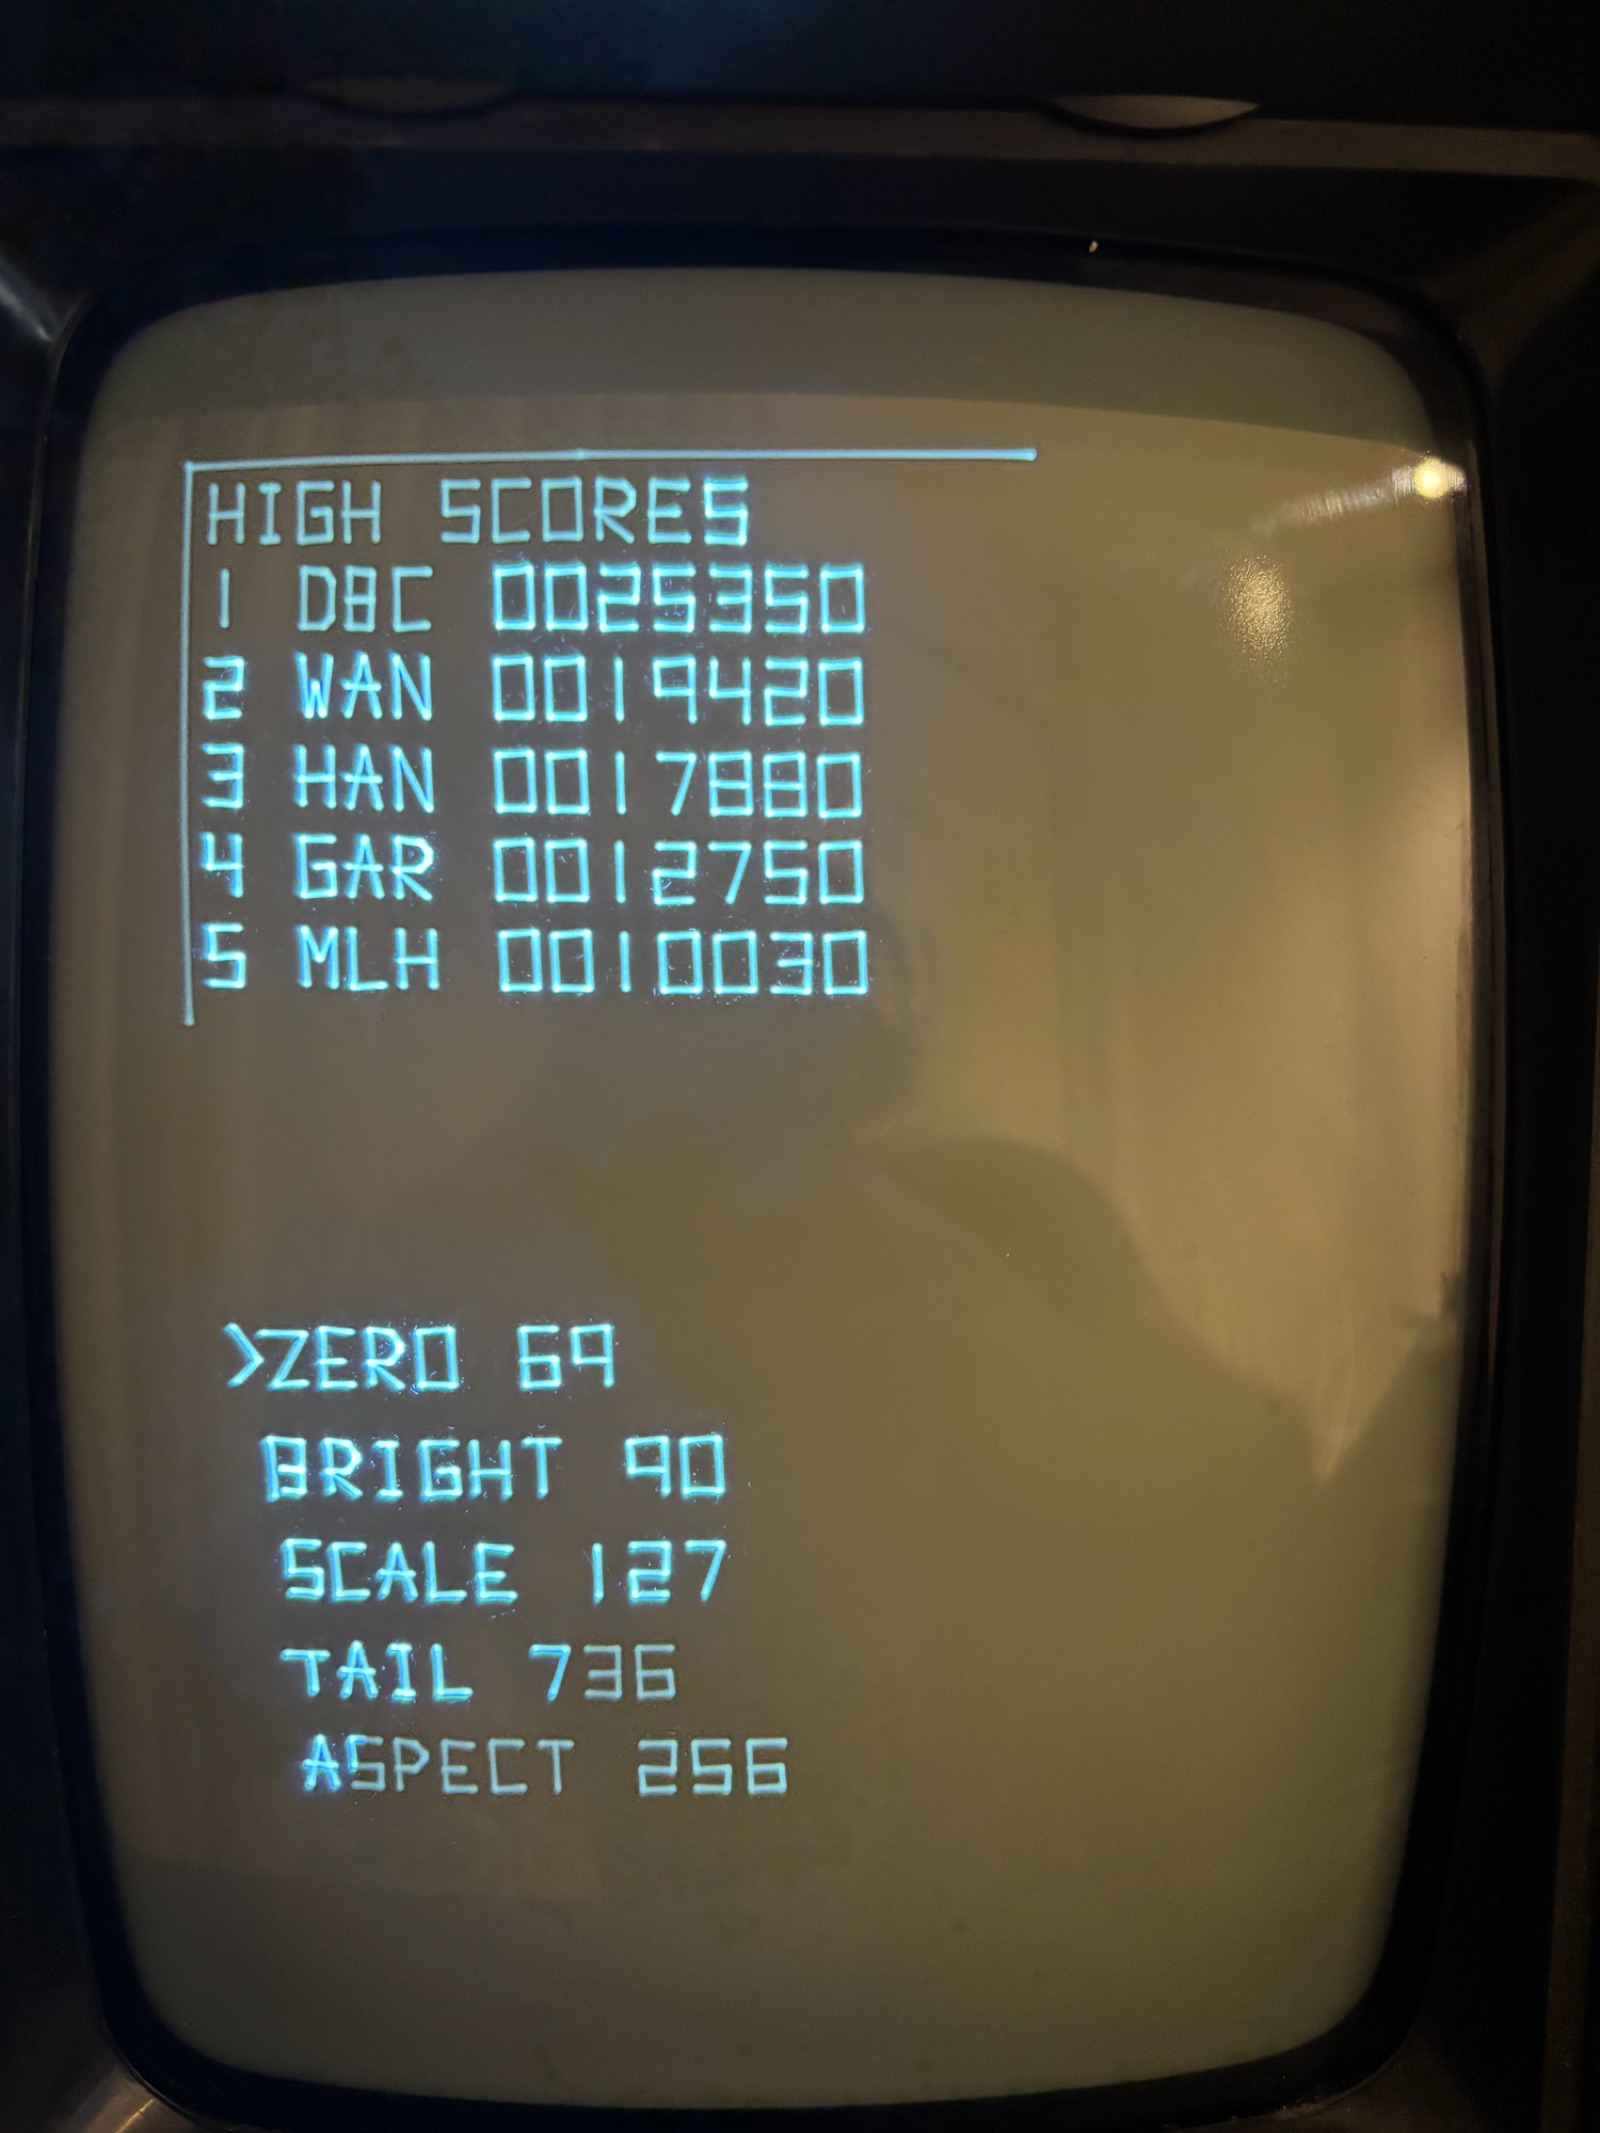
The reset button
With SDK v1.4.0 or later, the console's reset button works in a UVMC2 game: one press restarts the game, two presses go back to the multicart menu.
For the board itself, the .um2 format, the GPIO map and the PSRAM, see The Hardware.
Upload to Cartridge
Build → Upload to Cartridge (UVMC2, USB) puts the game you are working on into the UVMC2 and starts it. Plug the cartridge into your computer with a USB cable. No card reader, no swapping SD cards. It needs the UVM2 target. Pin SDK v1.4.0 or later: older releases have no USB monitor, so the upload only works from the multicart's menu and the game cannot be debugged.
What happens:
- The IDE builds the game with a small USB monitor linked in (it costs about 2 KB of SRAM).
- It copies the
.um2onto the cartridge's SD card over USB, withMONITOR.BINbeside it, and checks every file with a CRC-32. - It loads the game straight into the RP2350's RAM and runs it, so the game starts the moment the upload ends. The game also stays on the card, in the multicart's menu, for later.
The whole round trip takes about 5–7 seconds.
Two starting states
| The cartridge is... | How the IDE reaches the card |
|---|---|
| Running a game built with the monitor | The monitor answers on USB while the game runs. |
| Sitting in the multicart's menu | The IDE starts a small RAM-only SD bridge on the chip. The cartridge's flash is never touched. |
Either way the console shows an upload screen: a turning logo, the game's name and a progress bar.
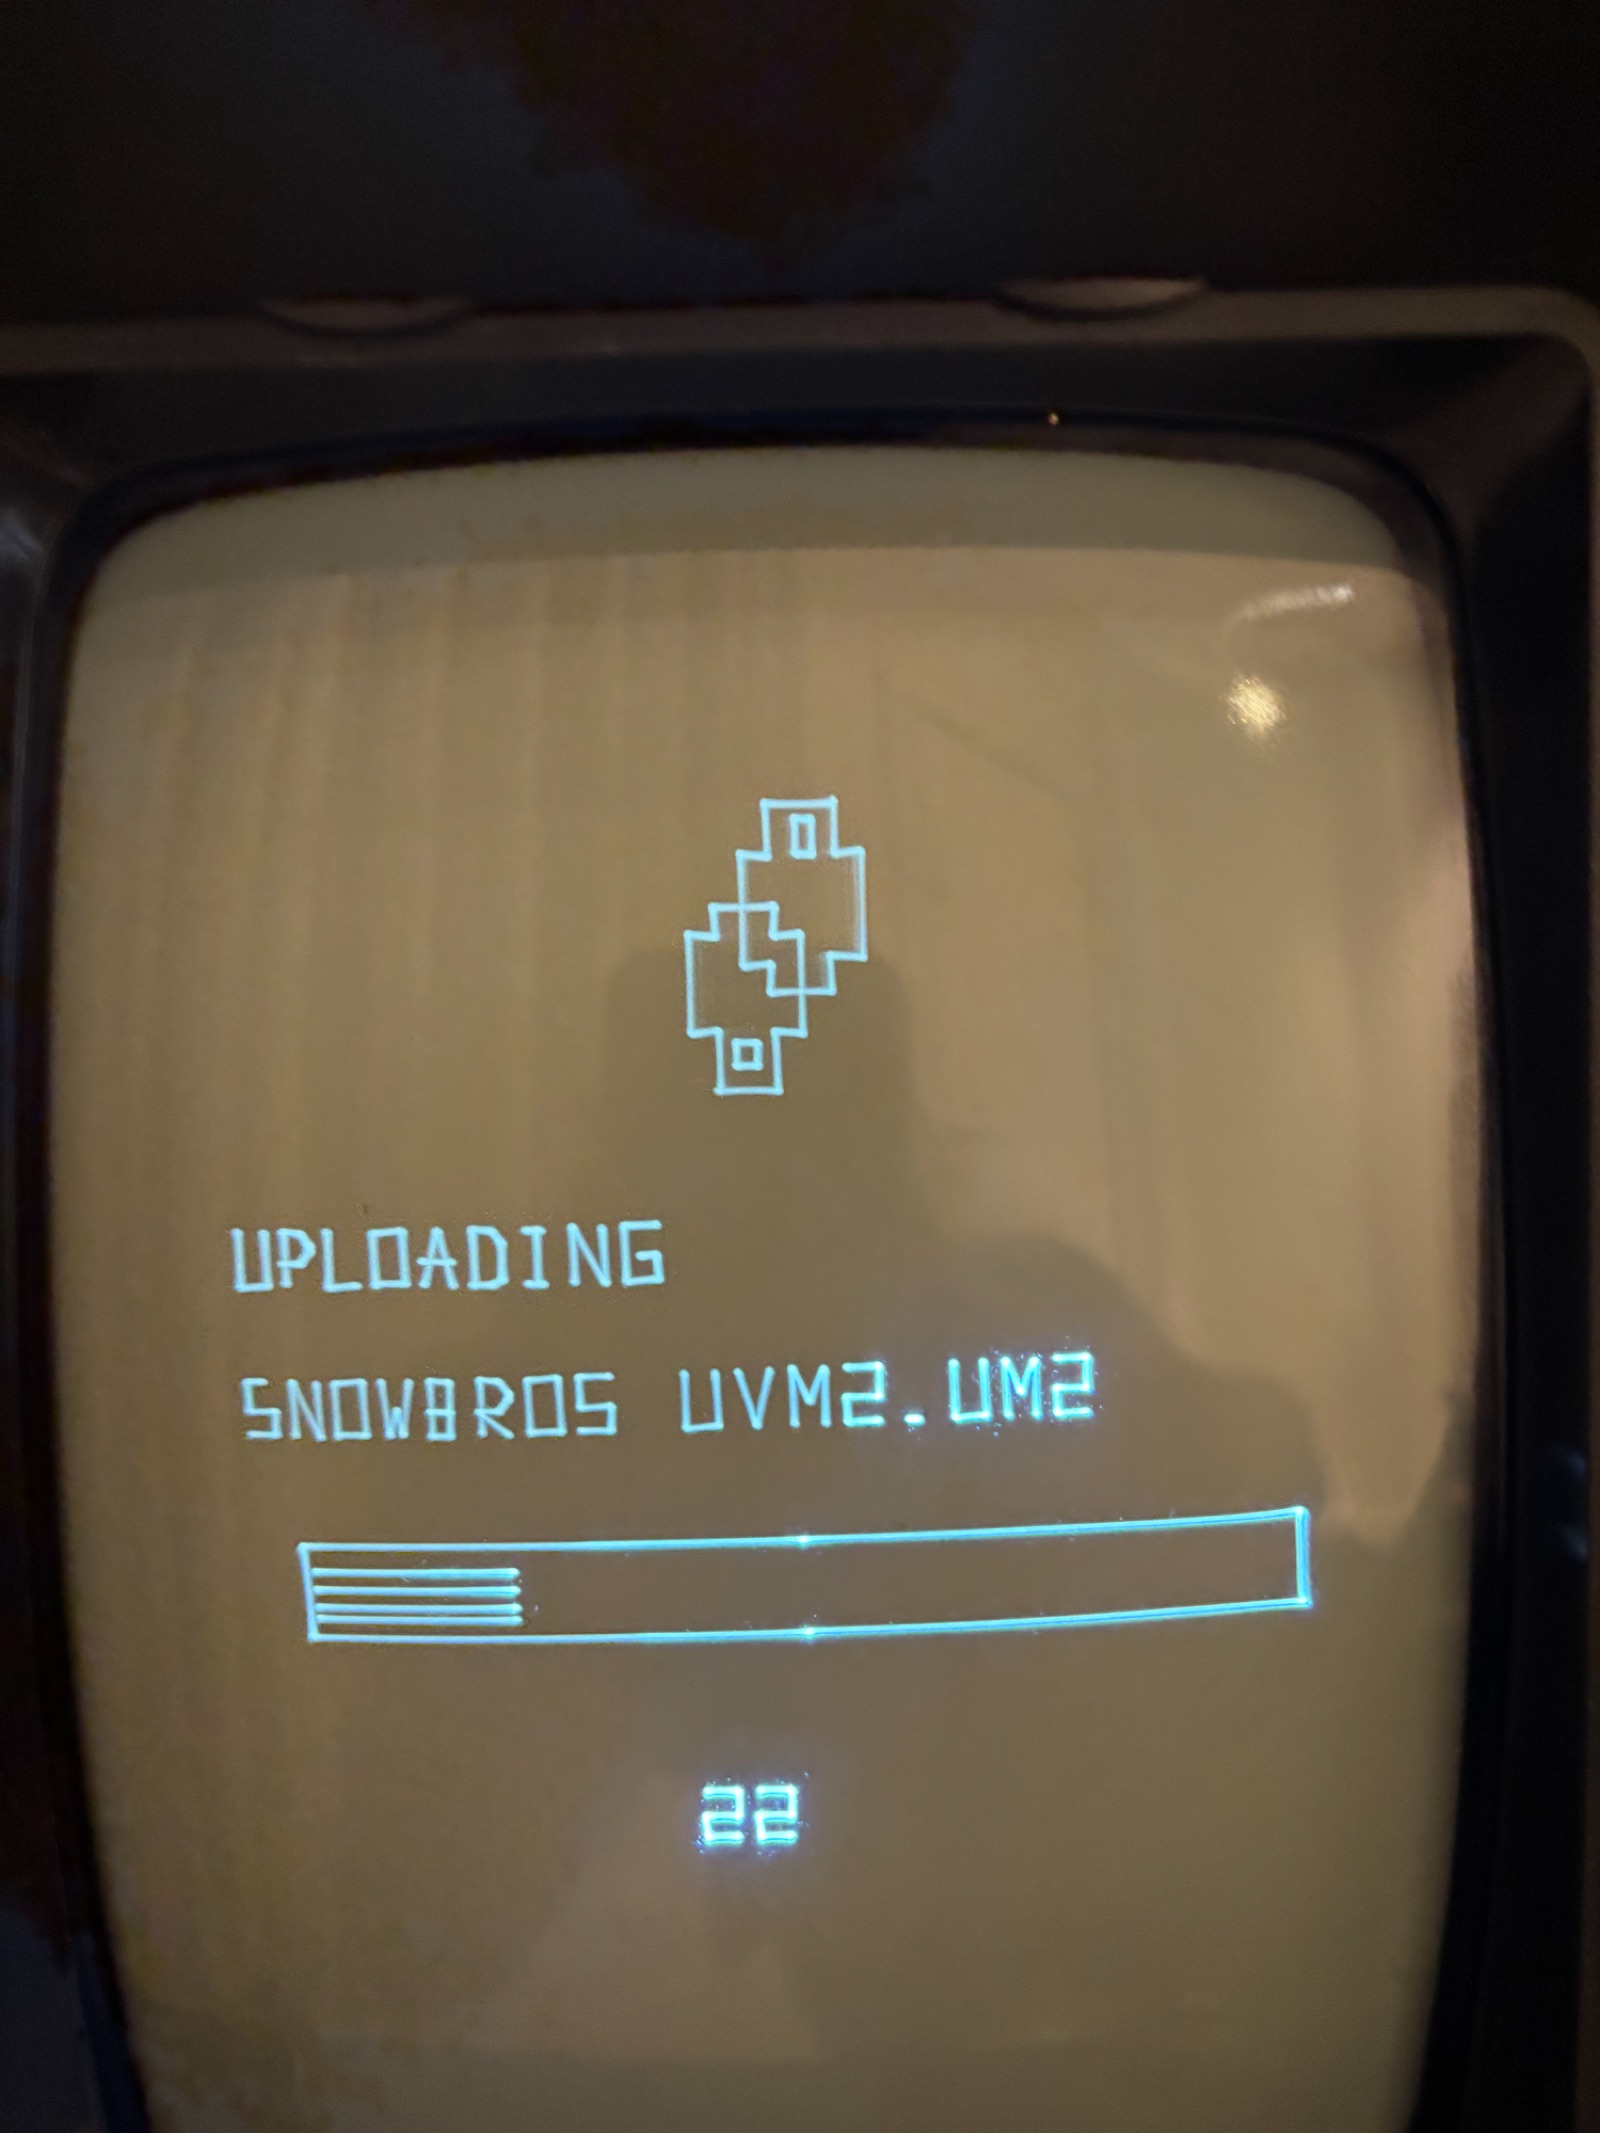
What each system needs
The upload uses picotool and the monitor's serial port.
| System | picotool | Serial port |
|---|---|---|
| macOS | brew install picotool | /dev/cu.* |
| Linux | Built by the IDE with USB support on the first upload, into ~/VectrexStudio/tools/picotool (a picotool 2.x on the PATH is used first) | /dev/ttyACM* |
| Windows | Downloaded by the IDE (Raspberry Pi's prebuilt) | A COM port |
- Linux: the
.debinstalls a udev rule,/etc/udev/rules.d/60-vectrex-studio-uvmc2.rules, so the logged-in user reaches the cartridge's USB and serial port without sudo or thedialoutgroup. - Windows: the chip's boot mode and the menu's reset interface are WinUSB devices, so there is no driver to install. Upload to Cartridge has been run on Windows with a real cartridge.
Once a game is on the cartridge, Debug → Debug on Cartridge debugs it over the same cable: see Debugging.