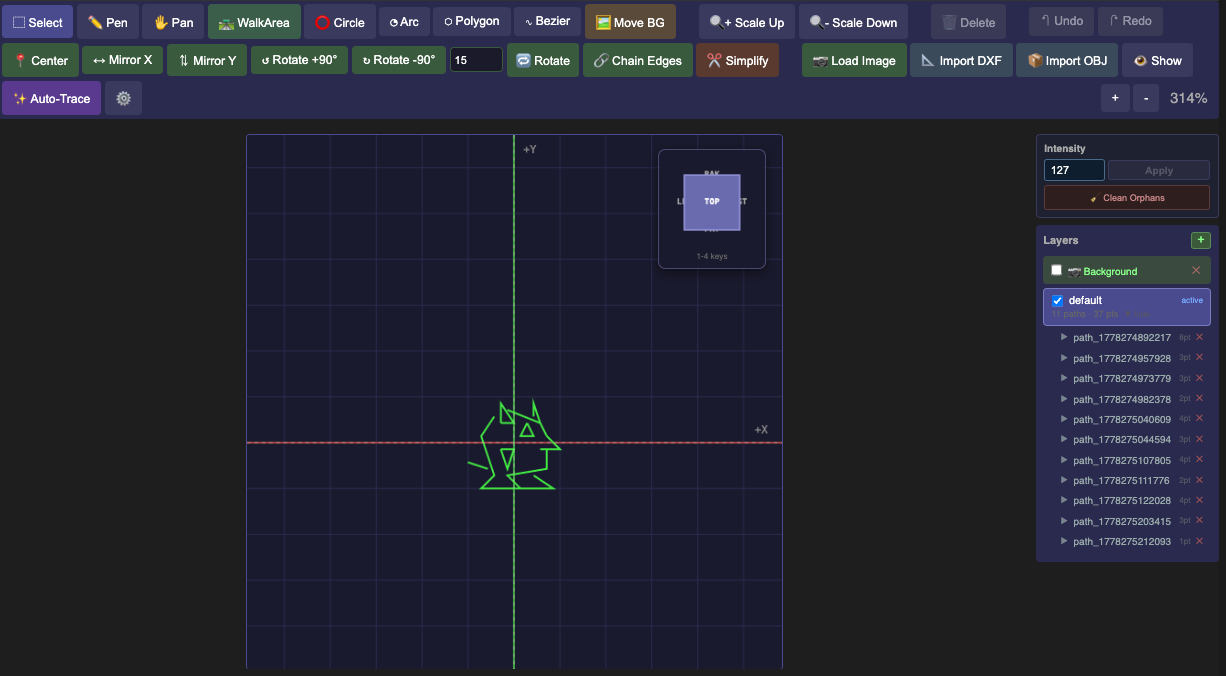
The Vector Editor opens automatically when you create or double-click a .vec file. It is a 2D (and optionally 3D) path editor that works directly in Vectrex coordinate space (−128 to +127 on both axes).
Canvas and coordinate system
The canvas shows the Vectrex screen boundary as an outlined rectangle. The origin (0, 0) is in the centre. X increases to the right; Y increases upward — the same convention used in your VPy code.
Use scroll wheel to zoom (1×–8×) and middle-mouse drag to pan.
Tools
| Tool | Shortcut | Use |
|---|---|---|
| Select | S | Click or drag-box to select points; drag to move |
| Pen | P | Click to add points to the current path |
| Line | L | Draw straight two-point segments |
| Bezier | B | Draw smooth curves with tangent handles |
| Polygon | G | Place a regular polygon (set sides in properties) |
| Circle | C | Draw a circle approximated as a polyline |
| Arc | A | Draw an arc segment |
| Walkable Area | W | Paint a horizontal shelf where enemies can walk (used by the wander AI) |
| Pan | Space+drag | Navigate the canvas without deselecting |
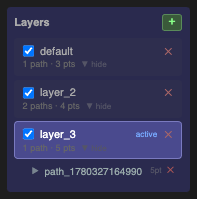
Layers
The left panel lists every layer in the file. Each layer contains one or more paths.
- Click the eye icon to toggle layer visibility.
- Click a layer name to select all paths in it.
- Use the + Layer button to add a new layer.
- Drag layers to reorder them (draw order, bottom to top).
Path properties
Select a path to edit its properties in the right panel:
| Property | Description |
|---|---|
| Intensity | Beam brightness, 0–127. Higher = brighter. |
| Closed | Connect the last point back to the first. |
| Name | Optional label, used for debugging. |
Select individual points to move them by dragging or by typing coordinates in the input fields.
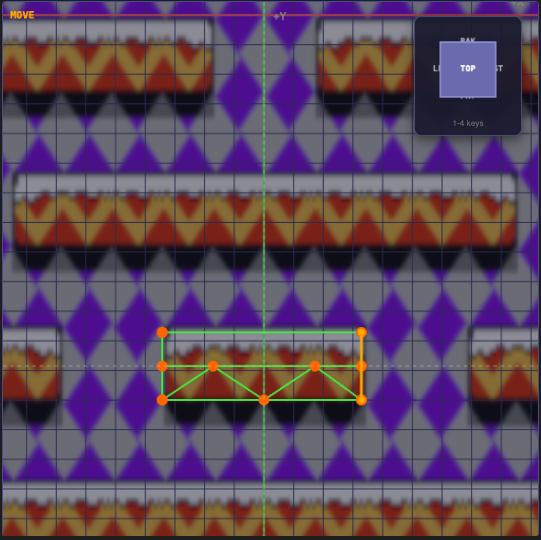
Walkable areas
Switch to the Walkable Area tool and drag horizontally across a platform to define the shelf where enemies patrol. Each area has a Y level, an x_min, and an x_max. The Playground editor reads these to derive enemy patrol routes automatically.

3D view
Click the 3D button in the toolbar to enter perspective mode. Use pitch and yaw sliders to rotate the view. Paths remain flat (Z = 0) unless you explicitly add Z coordinates to points — useful for tracing reference geometry before flattening to 2D.
Background image
Drag any PNG or JPG onto the canvas to load it as a tracing reference. Use the opacity slider to dim it while drawing. The background image is not saved in the .vec file — it is editor-only.
The Edge Detection button (Canny algorithm) processes the background image and overlays detected edges as a guide. Adjust the threshold sliders to tune sensitivity.
Import
File → Import supports:
- DXF — 2D CAD drawings. Select the XY, XZ, or YZ plane to project onto.
- OBJ — 3D meshes. The editor extracts silhouette edges and projects them to a flat plane.
Both formats are converted to polyline paths. Adjust the angle threshold to filter edges by sharpness.
File format
.vec files are plain JSON. A minimal example:
{
  "version": "1.0",
  "name": "player",
  "canvas": { "width": 256, "height": 256, "origin": "center" },
  "layers": [
    {
      "name": "body",
      "visible": true,
      "paths": [
        {
          "name": "outline",
          "intensity": 127,
          "closed": true,
          "points": [{"x": 0, "y": 10}, {"x": 8, "y": -10}, {"x": -8, "y": -10}]
        }
      ]
    }
  ]
}